Showing posts with label how to. Show all posts

5.19.2015

Tips on Meal Planning


We all have the best intentions. 
We go to the grocery store, we try and get what we think we need for that day/days/week, we make a list, we scan the aisles, we unpack the bags, we know what is there. 
But then the week gets in the way, the kids are a nightmare, traffic is a joke, a meeting runs late, you need wine more than food. And spaghetti it is and groceries go bad in the fridge. 
This scenario is not only common, but also totally fine. 
We cannot all have it together and get a meal on the table each night. I certainly do not and I am one of the fortunate ones who actually have minor skills in the kitchen. It is even harder for those that are dipping their toes into the wide and overwhelming world that is cooking. 
But, there is hope and a few ways to make your kitchen a safe haven (experience or not) and not a stress and sweat induced room that gives you anxiety around mid day. 

Plan out your week, then plan out your meals. 
Take the time to get every one's schedule together for the week. Throw out the nights you know that dinner will be a struggle (take out! leftovers! scrambled eggs!) and focus on the nights you know that cooking is possible and plan around the prep time you have. Once you know how many dinners you have to put together, you can make a grocery list, and know exactly how your week is (most likely) going to go. 

Keep it healthy and work by the numbers. 
On the weekends we tend to have a diet free-for-all, so during the week I try to stick to a protein and veggie heavy menu. So especially for those weeks when I want to keep things simple, I buy one protein, one veggie, and ingredients for a salad for each night I cook. Proteins can always be grilled or roasted and veggies can always be roasted or steamed. It is simple and when a new recipe sounds like more work than any fun, this is the perfect plan. 

Designate each night as a certain dish. 
I recently read this on Cup of Jo and thought it was genius. To keep meals super simple, you make the same type of dish each night of the week. Example: Monday is stir fry, Tuesday is tacos, Wednesday is pasta, Thursday is soup and salad, and Friday is burgers. Then you just switch up the ingredients for those dishes each week so it does not get stale. 

Go to the market the least amount you can. 
Errands, ugh. The ultimate time suck. Plan your week, make a list, and get everything you need for the week. This makes you plan ahead and then you will be more motivated to execute your menus if the food is already sitting in your fridge. 

If you are up for an adventure, just try one new recipe a week. 
No one is judging you in the kitchen except yourself and whoever you may be feeding. Who by the way are lucky to have you and anything you make. So don't pressure yourself to go off your already well beaten cooking path if it keeps you sane. But if you are up for something new, pick one meal or even just dish a week. Low pressure equals better success and more fun. If you are looking for any new ideas look here or my previous cooking site! 

Do you have any tricks you use to get dinner on the table? I would love to hear them! 

xo
Erin 


2.24.2014

Just Add Antlers

I am back from the sunshine and gearing up for another frigid week. Being away is so nice, but sometimes coming home can be the best. It reminds you of why you love where you live. Minus the polar vortex, of course. 

Ever since we got home, I have been in full organize/decor mode. Mostly to try and clear all the clutter created by the babes or their stuff that is. But also a little refreshing makes spaces feel newer, even if it is just moving a vase from here to there. One new item that I have added to the abode is this set of elk antlers I scored at a local antique store. 


They were originally slated for above our bed, but they were too tall. So they have found a home above our back door that leads to the mudroom/laundry/garage. I actually think this is a better spot in all. 


These babies are no joke, heavy and super tall. Why this space makes more sense is it brings your eye up more to the vaulted ceiling that only runs along one side of the kitchen/family room. 


I have used antlers before in the faux variety in the dining room. Because we live in the country, a little nature seems very appropriate to incorporate into the decor. 

If you are looking for real antlers such as these, the best resource is your local antique or thrift store. Ask the owner to be on the look out in their shopping and they can find you one if they do not have one already. Ebay and Hunter's Alley also usually have some. 

You can find some great faux options at West Elm. 


These run only $99-$199 and are papier-mache. 

This Etsy store is where the deer head is from in my dining room. 


They have every color combination that you could want and animal. These are plaster, so the quality is better. Also under $100. 

The woman who runs the antique store that I got the antlers from said "you can never go wrong with nature," when I was contemplating the purchase. Which is kind of cheesy, but so true. Look how a little nature has made a big impact in these spaces. 

Such a cool collection of antlers...

Love the mix of something rustic with the modern kitchen finishes... 

Even antlers can be femme...

They are such a great addition to this vignette... 

Happy antler hunting. 
xo
Erin 


1.18.2013

Casual Friday

While it is fun to get inspiration from our favorite ladies for dressing up, it is really dressing down that we do more often. I am constantly trying to find that perfect balance of comfort and chic. Trying to stay away from yoga pants and oversized sweaters is so hard! These three girls show us that perfect mix and how to execute it right. 

Miranda is pretty flawless and I love the leather leggings with the wedge sneakers, which I am kind of getting into. 

 moto jacket (obsessed) $79 / bag $1500 / leggings $130 / sunglasses $32 / sneakers $149

I always thought that Hayden was kind of cheesy, but after her chic look at the Globes and this outfit at the airport, she has won me over. The peace sign, not so much. 

leather bomber $232 / fur scarf (obsessed) $188 / cropped skinnies $185 / boots $129 / hat $78

A blazer and jeans is so classic and easy to put together. You know Rachel is off doing something fab, even on a day she is dressed down. 

blazer (obsessed) $130 / t-shirt (the best) $80 / jeans $218 / sunglasses $225 / satchel $165

Happy weekend loves! 
xo
Erin 


12.11.2012

Hot Roller Holiday Hair

I am a true loyalist to the hot roller. Is that weird? I have loved them since middle school and never looked back. 

My fondest memories of them are waking up extra early freshman year of high school so I could set my hair in those hot little numbers for perfect curls. Which is funny because I was into the granola look then, all thrift store cords and North Face t-shirts. Regardless, I can look back and know my hair looked fab. 

I broke them out the other night for a dinner party I threw. And the results did not disappoint. It makes for great holiday hair. 


There are not a whole lot of tricks, but here is how I roll... (so not funny, yet I am giggling)...

1. Make sure they are super hot before using. Roll the big ones on top down the middle of your head, like a mohawk. 

2. Then work your way down by levels, using the smallest ones on the bottom. Which is kind of backwards, but the bottom gets the least amount of time, so I figure the smaller give more curl. 

3. Leave them in until they cool completely. Do your make up, have a snack, pick out your outfit, paint your nails....

4. Unroll in the same order you put them in leaving the curl as much in tact as possible. You won't be able to see if you do it right. 

5. Once they are out, flip your head a couple of times, then run your fingers gently through the curls. Spray with hairspray. I like Elnett. 

6. Your curls WILL be too curly at the beginning, but they will fade to lovely low curls in a bit. If not, run your fingers through them a bit more until they are the way you want. Spray with hairspray again. 

Happy curling, ladies. 
xo
Erin 

12.07.2012

Decking the Halls

Putting up Christmas decorations always starts fun for me, but always ends up being a bit more work than I remember. This year, there are more mantels to decorate and I wanted to use things we already had. Outside, I actually hung the garland and lights myself only to find them on the ground an hour later. Matt rehung them for me (almost) happily. I was bummed since I wanted to accomplish that on my own, but at least I tried? 

I went with fresh garland and just lights around the entry. The house is set away from the street, so really no one will see it except guests and us. It was my first round buying real garland. I clearly did not pick the lushest of them, which I will do next year. 


The larger LED lights are a cooler color than the traditional. I like how much it lights up the entry. I bought the wreath (all of them) and got crafty by making the bows. 


We use a fake tree inside. It is just easier and I love how it is already lighted. My mom gave me these fun yellow, silver, and black striped ornaments last year. I love the unexpected colors in the tree along with the more traditional ones. 


The fresh wreaths inside make up for the fake tree. They smell amazing. To keep them fresh, I spritz with some water every other day or so. The little bells garland and the crystal candlesticks are what I usually use as the centerpiece for Christmas dinner. 


These glass vases are always on the island, so I just filled them with some pine cones and garland. I am using that low vase to hold Christmas cards this year. 


Glittery little trees for the side table in the family room. 


The mantel in the family room has some great (fake) garland from Nell Hill's that my mom sent me on it. 


Also from Nell Hill's is this amazing lighted wire. It is battery operated, flexible and gives off great light. Genius for indoor decorating. 


I used this idea last year. It is an easy way to add cheer to a vignette. 


The mantel in the living room I kept simple since the tree is in here. I watched a video to help me tie the wreath bows. I used a plaid tartan and white polka dot ribbon. Then I used some bulb lights from Ikea and Moroccan tea glasses as votives. It will be pretty with the lights turned off at night with the tree. 


Since I was already all over the decorating, I finally put round bulbs in my new light fixture (vintage). I go in the living room and turn it on all the time now. Just to stare. Yep, obsessed. 


Here's to happy holiday decorating and a fun weekend. 

xo
Erin 

10.18.2012

Braided Messy Bun

braided messy bun

Top knots and buns make bad (dirty) hair days lovely. Wearing my hair down with a feisty, grabby baby is just not worth it. So I find myself piling my hair on top of my head almost daily. I also have been on the braid train for awhile, so combining my two favorite ways to pretend I did my hair was logical. And as it turns out, pretty. 

1. Gather hair into a high ponytail, using a paddle brush to smooth out any bumps. Secure with a tight elastic. 

2. Tease and "mess up" the pony a bit to give your hair some texture and extra thickness. 

3. Divide hair into three sections and braid. Secure end with a clear elastic. 

4. Wrap braid around pony tail holder, tucking the end in. Secure with hair pins. 

5. "Rough up" the hair around your face, to make it look more undone. 

The more texture you give your hair, the better! 

xo
Erin 

9.12.2012

Easy Update

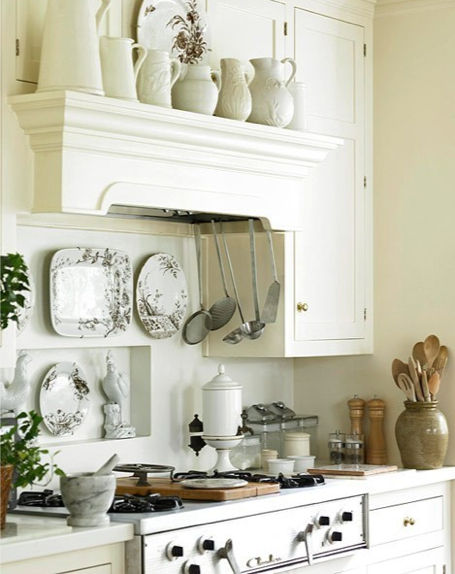
Slowly, but surely, I am starting to settle in and even hang some pieces on the walls. There was a big gaping hole over the stove that was screaming for something to fill it. I have never hung anything above a stove and thought it might be a little funny to have framed art hovering over pots and pans sizzling and bubbling on the range. I bought these vintage French serving piece prints at an antique fair a few years ago. They are pages out of an old catalogue and I love them. I had them mounted on charcoal grosgrain and framed in metallic silver. And I think above the stove is the perfect spot...


Given my current indecisiveness, I used 3M hooks so I can easily rearrange. Although, I think these two prints have found their home. 

After some searching on Pinterest , I realized there are a lot of ways to fill that empty space. Similar to what I did, these botanical frames are fantastic. 


This built in nook and faucet is genius. 


Charming dishware can be displayed.


A simple pot rack makes for a pretty space and functionality. 


More contemporary than my kitchen allows, bit this shelf is perfect for prep and tools. 


8.29.2012

Not on the Registry


Even though it has only been six months since the babe came, it might as well be a lifetime. Those first few weeks and months of having a newborn have slid from my memory quickly. Not the great parts, like first baths, tiny finger grips, and locking eyes for what seemed like hours, but the hard parts like the complete and utter exhaustion, the hardships of nursing, and the baby blues. When you are in it for the first time, it can feel like your life will never resemble what it was before baby. Then as the weeks go on and the baby grows with you as a new mom, you start to get it. Each week, just a little more. We are still adjusting, but it sort of feels like life has settled into our new normal. 

With so many friends in the trenches of newborn-dom or about to embark on them, I wanted to share what resources seemed to help me the most through those first couple months. The internet is a deep dark place filled with crazy people, but somehow during that 3am feeding you will listen to any one's advice or story. Funny since they could be living in scowler and misrepresenting their entire experience. 

A few things that I found the most helpful are not registry items or keepsakes that are jammed in your house right now. They are simple resources to help you through and keep you sane. 

The Similac Strong Moms iPhone app was my favorite tool right from the start. You can keep track of everything. Diaper changes, nursing (length, side, amount, etc.) sleeping, bottle feedings, and growth. Once you start entering, it then helps to predict your baby's schedule. I tend to like data, so it was nice to see patterns emerge a bit (even if they were that your baby only sleeps during the day) and it gave me something to reference each day. 

I mentioned this book in my registry post, but I can not stress enough how helpful Healthy Sleep Habits, Happy Child by Dr. Weissbluth has been. He started out with no more than two hours of sleep at a time. I followed the book exactly (even CIO) and he started sleeping twelve hours a night at about three months. Some of that is biological, but a lot of it was following the science behind sleeping and this book is a great guide. 

The Babycenter site and apps were so helpful during pregnancy. You can also download their My Baby app to follow along with tips and information based on the birth date. You can also join the Birth Club for that month on the app and follow along with other moms who are right there with you. This can be another breeding ground for crazy, but I liked seeing posts from other new moms with the same questions and problems. Just knowing that someone out there was going through the same things was a relief. 

Other new moms was by far my favorite resource and outlet. No one is as great as someone who is going through the same life experiences that you are. I was lucky enough to have three friends with newborns at the same time. I also connected with old friends from college through Facebook who I might not have gotten close with again otherwise. 

If you are in newborn-land right now or about to be, know that it is a crazy amazing time. You will struggle with some it and at the same time relish in it. Those sweet moments of your tiny baby getting used to the world does not last long. Enjoy, reach out, and know that life will settle into something "normal" once again. 

xo
Erin 


7.11.2012

Grilled Artichokes

Artichokes are on top of my favorite food list. Though a little scary to look at and imagine how to prepare, it could not be easier. I showed you how to trim, steam, and simply enjoy in this post, but now I have taken it a step further and grilled them. 


Follow the same steps (rubbing with lemon along the way), but leave the stem. I like to trim off a few of the bottom leaves and run a knife along the stem to get to the more tender parts, but it is not necessary. 


Then cut the artichoke in half. With a spoon or melon baller, scoop out the choke (hairy looking part) and the purple leaves. 


Steam the artichokes until just tender 20-30 minutes depending on how big they are. 


Heat a grill to medium-high heat. Brush the artichokes with olive oil and minced garlic. Season with salt and pepper. 


Grill indirectly uncut side down for 10 minutes. Then flip and grill another ten minutes directly on the heat. 


You can serve them warm or at room temperature. So making them ahead for a party is perfect. I like to  serve with a mayo based sauce. Here are my two favorite: 


Whisk together light mayo, lemon juice, minced shallot, and some Dijon mustard to taste. Season with salt and pepper. 


or


Whisk together light mayo, lime juice, minced garlic, sriracha, soy sauce and toasted sesame oil to taste. 


Love this recipe and it can wow your guests without much work. 


xo
Erin 


1.11.2012

Braid Halo

I have been trying to master the braid halo recently. I have found if you do it too tight or pulled together, it looks like you belong on the hills of Switzerland milking cows. So something that looks a bit more like this is what I am striving for....

via Pinterest 
My attempts have been lack luster. Little Olsen here clearly has curly hair going for her, which makes that messy look way easier to put together. I have pulled off a version that I am starting to like. I start with dirty hair and rat it up a bit, then braid into pig tails, just like the ones you used to sport as a three year old. 


Then pin up one side, then the next hiding the ends of the first section by covering it with the second. Tuck the ends of the second section under the first. 


I like to use hair pins and bobby pins. The bobby pins help keep it tight and the hair pins allow you to tuck in the pieces without messing up the rest of your 'do. 


back of my head

Please excuse my roots. Wow. 

Not the best tutorial, but I think with a few more tries I might just have it. This is a great way to throw hair up into something, especially when your ponytail streak has lasted almost a month. 

xo
Erin 


9.29.2011

Mantel Madness

Mantels can be tough to put together. There are endless ways to chic up your place by using your mantel as a center piece. And with all those ways, there are a lot of ways to make it over complicated. I loved this easy to use diagram I found on Honey & Fitz. An easy road map to help us novices.
image via 
Now I have a bit more of a dilemma at my house. Our television is mounted super close to the mantel and there is giant speaker underneath it. I have been playing around with how to dress it up without looking like I planted a bunch of junk up there. I have settled on this for the moment. 


I stare at it all day thinking how to change it and I certainly do not think that I have done the kind of job an actual designer could cook up. But in the quest of trying to make it look great, this is my favorite so far. 

My diagram is amateur hour, but thought I would share what I have done as I know there are many of you with this same TV over mantel set up. 


I am sure I will be changing it again in an hour. 


xo
Erin 

9.07.2011

Pony Up


The Dries Von  Noten show had beautiful gold rings encasing just-messy-enough pony tails. This is a very easy way to glam up a regular pony and can be done quite easily.


Use a small elastic or even better a clear one to secure your hair, then use an adjustable ring to hide it. I love the simplicity of the gold band, but also found some fun options on Zappos.


I bet if you searched your jewelry box you would find some costume pieces that would be perfect. 

xo
Erin 

LinkWithin

Related Posts Plugin for WordPress, Blogger...